How to Create a SendToDrive Account (Sign Up with Google)
Creating a SendToDrive account is quick and straightforward.
There is no separate “Sign Up” form or complicated registration process.
Instead, SendToDrive uses secure Google authentication.
Simply sign in with your Google account, grant the required permissions, and your account will be created automatically.
This means:
- No passwords to remember
- No email verification steps
- No lengthy forms to complete
Once you’ve signed in, you’ll be guided through a short onboarding process to create your first upload page. In just a few minutes, you’ll be ready to start collecting files directly into your Google Drive.
Follow the step-by-step instructions below to create your account and set up your first upload page.
Step 1 — Open the Sign In Page
Click Get Started on the homepage
or go directly to:
👉 https://sendtodrive.com/signin
Step 2 — Click “Continue with Google”
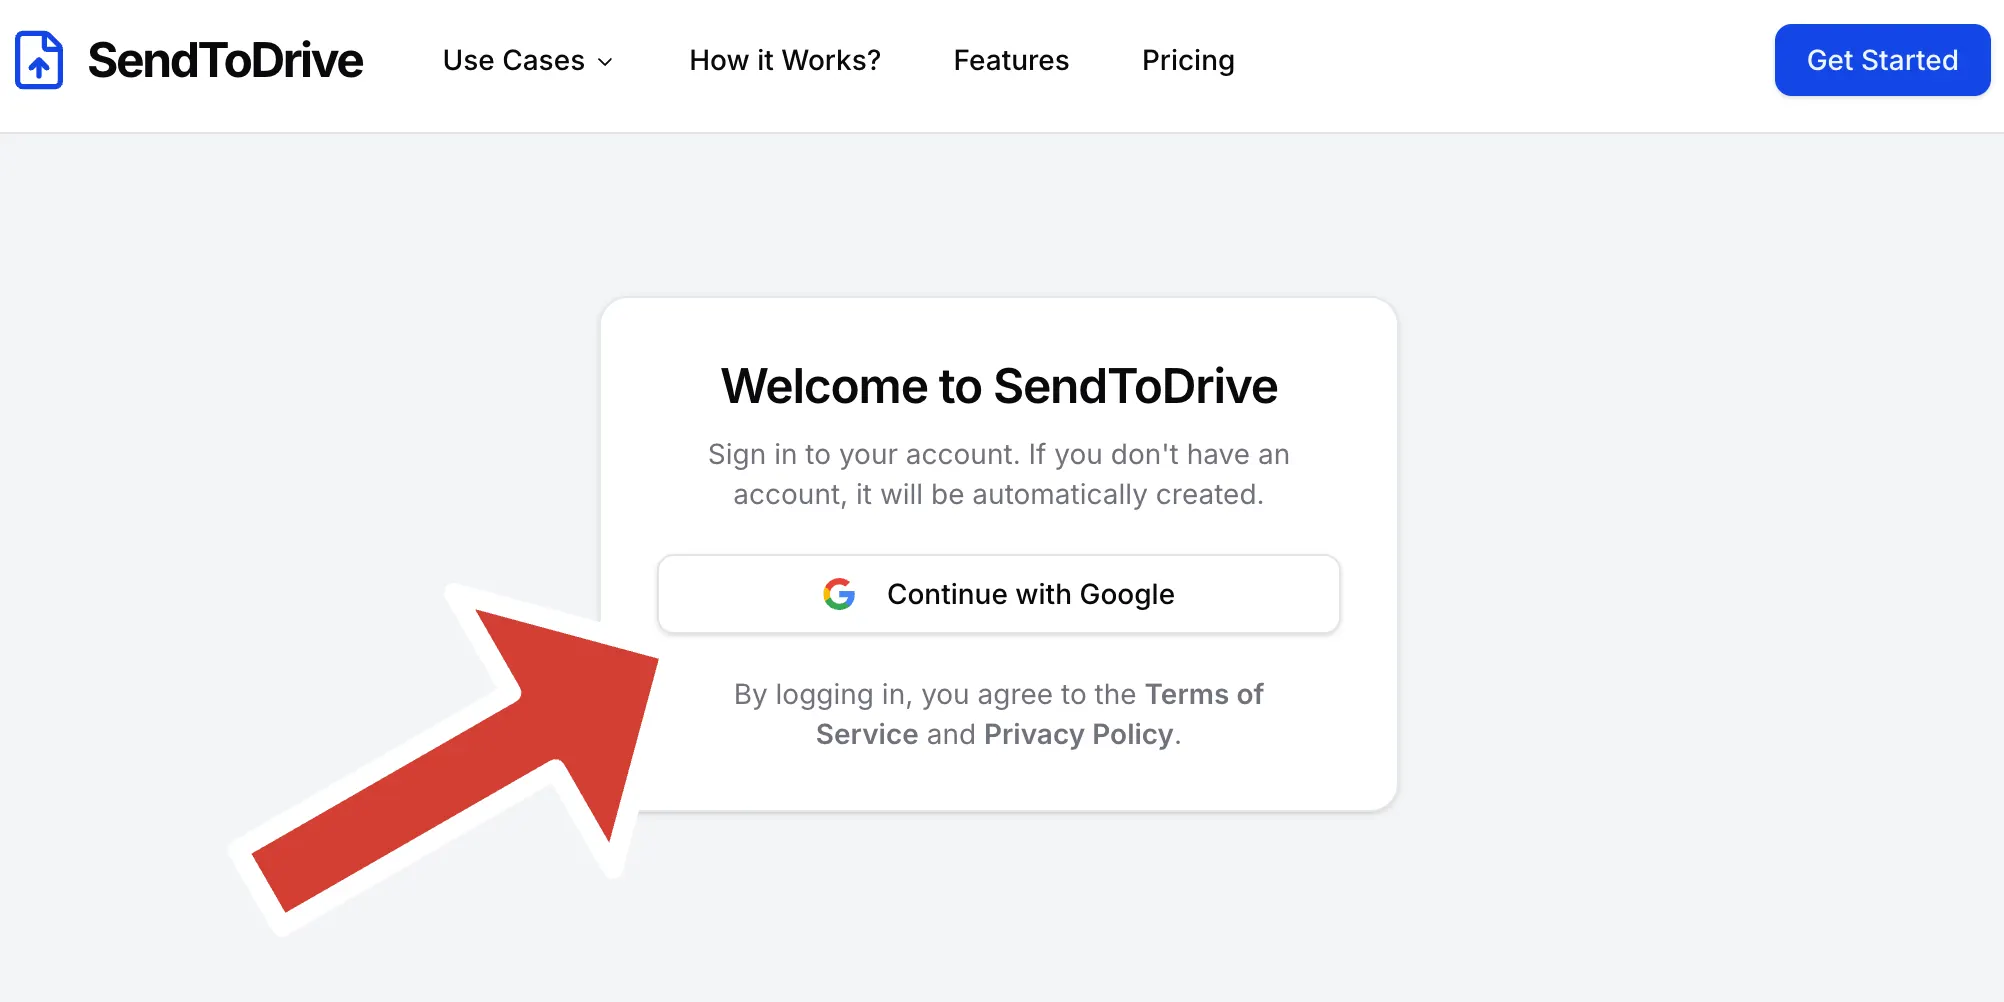
On the Sign In page, click:
Continue with Google
Step 3 — Choose Your Google Account

Select the Google account you would like to use.
Step 4 — Allow Basic Account Access
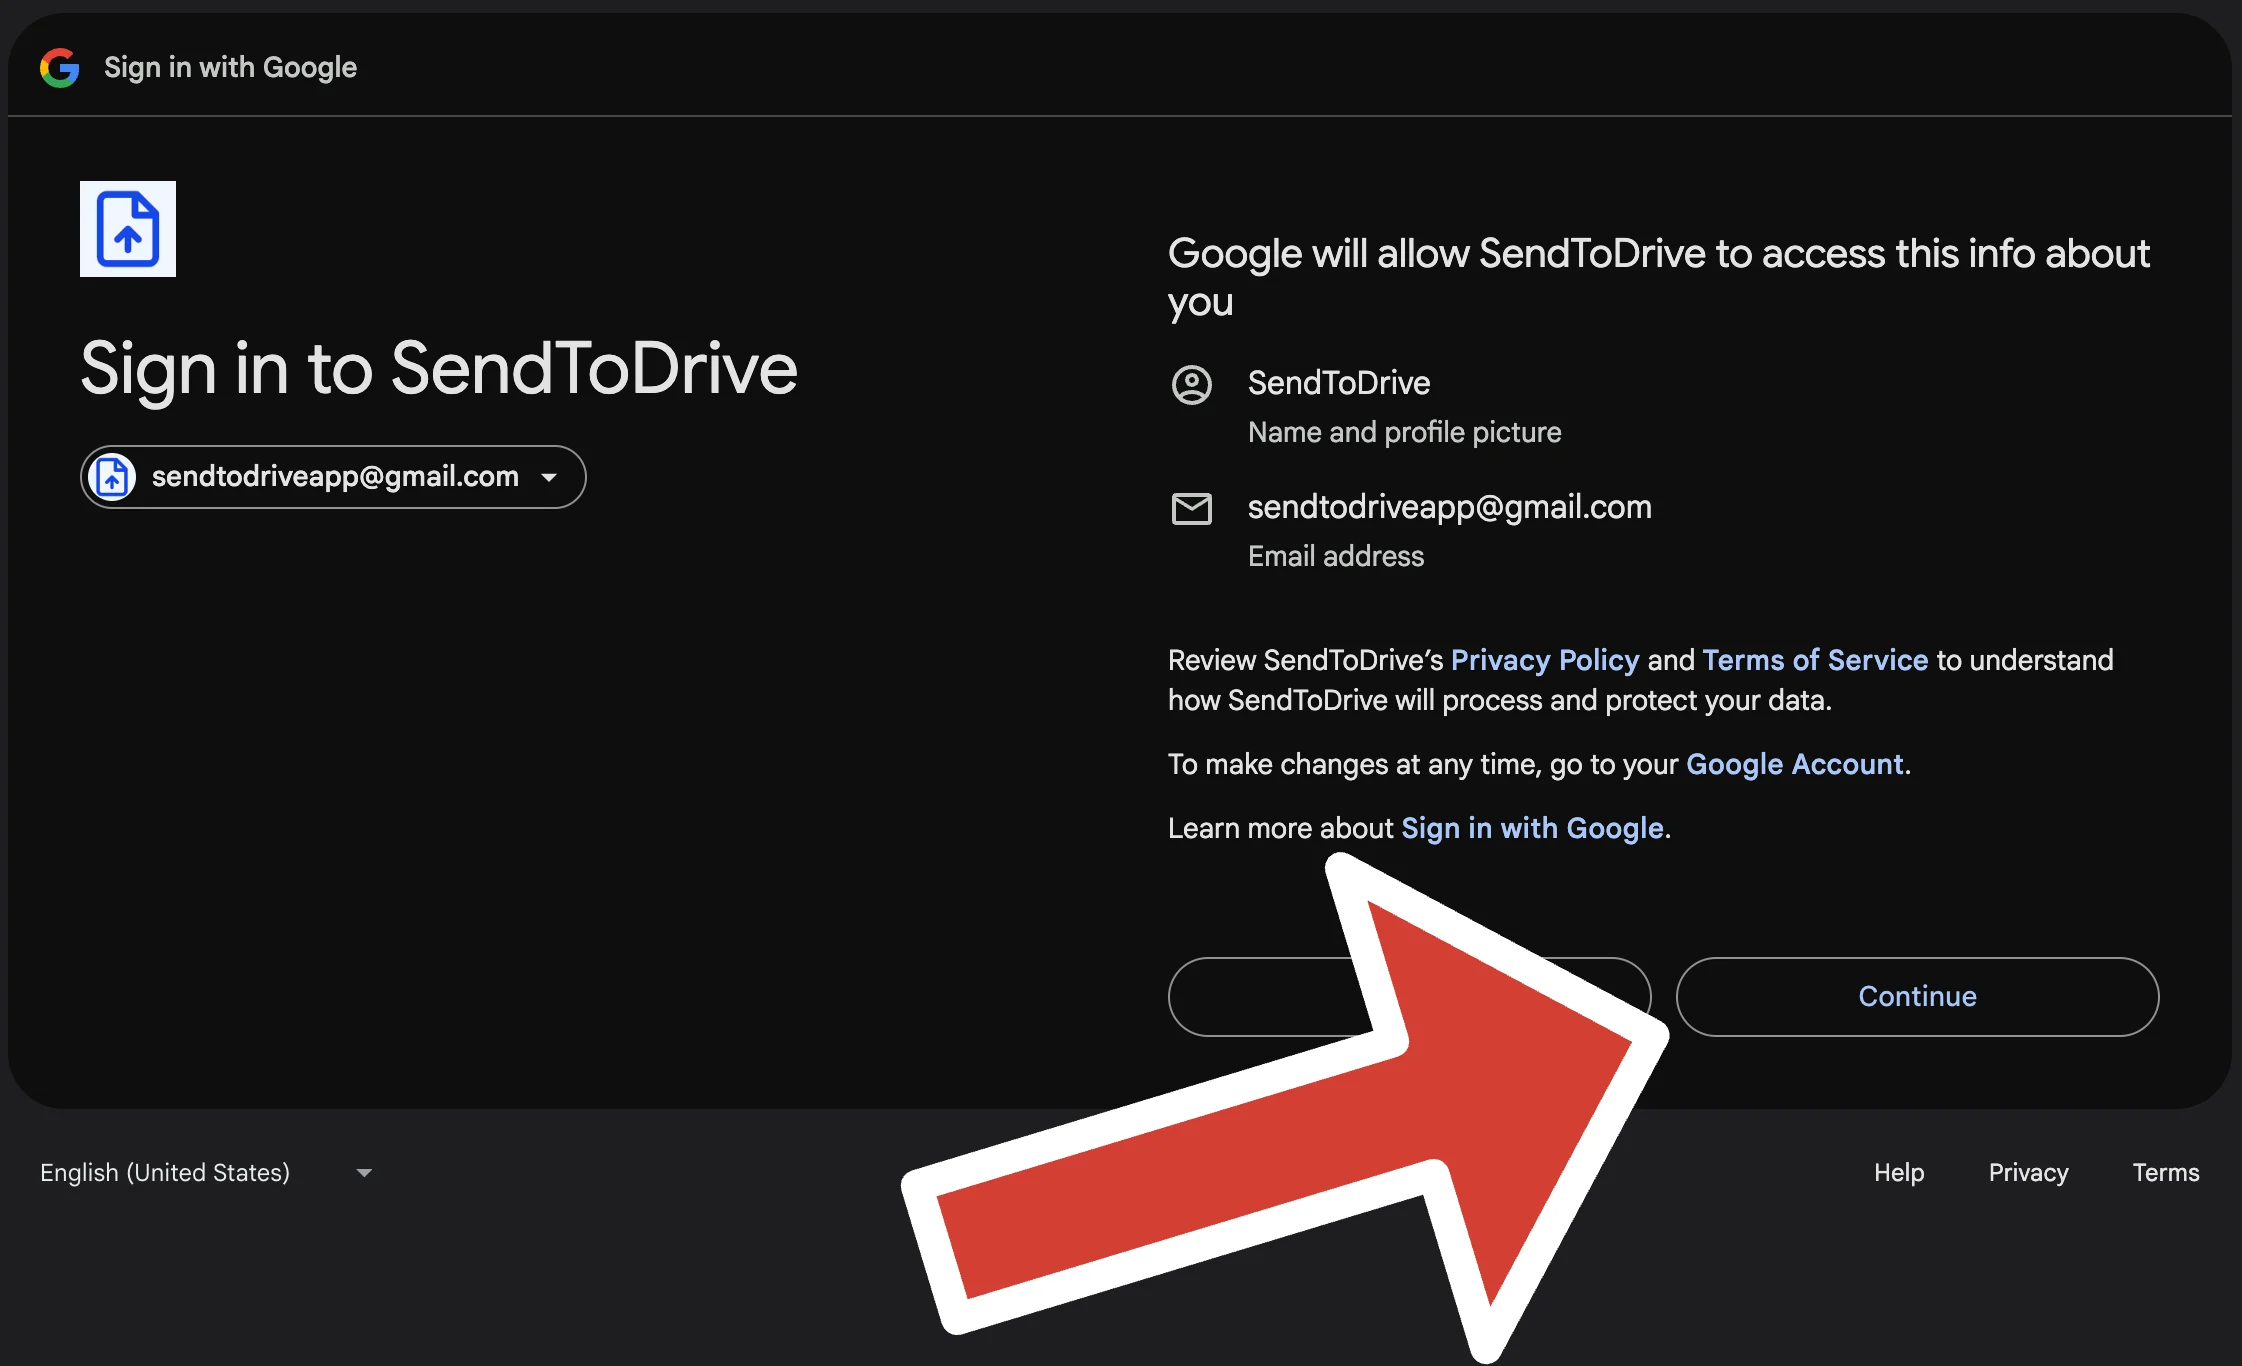
Google will display:
Sign in to SendToDrive
SendToDrive will request access to:
- Your name and profile picture
- Your email address
Click Continue.
Step 5 — Grant Google Drive Permission
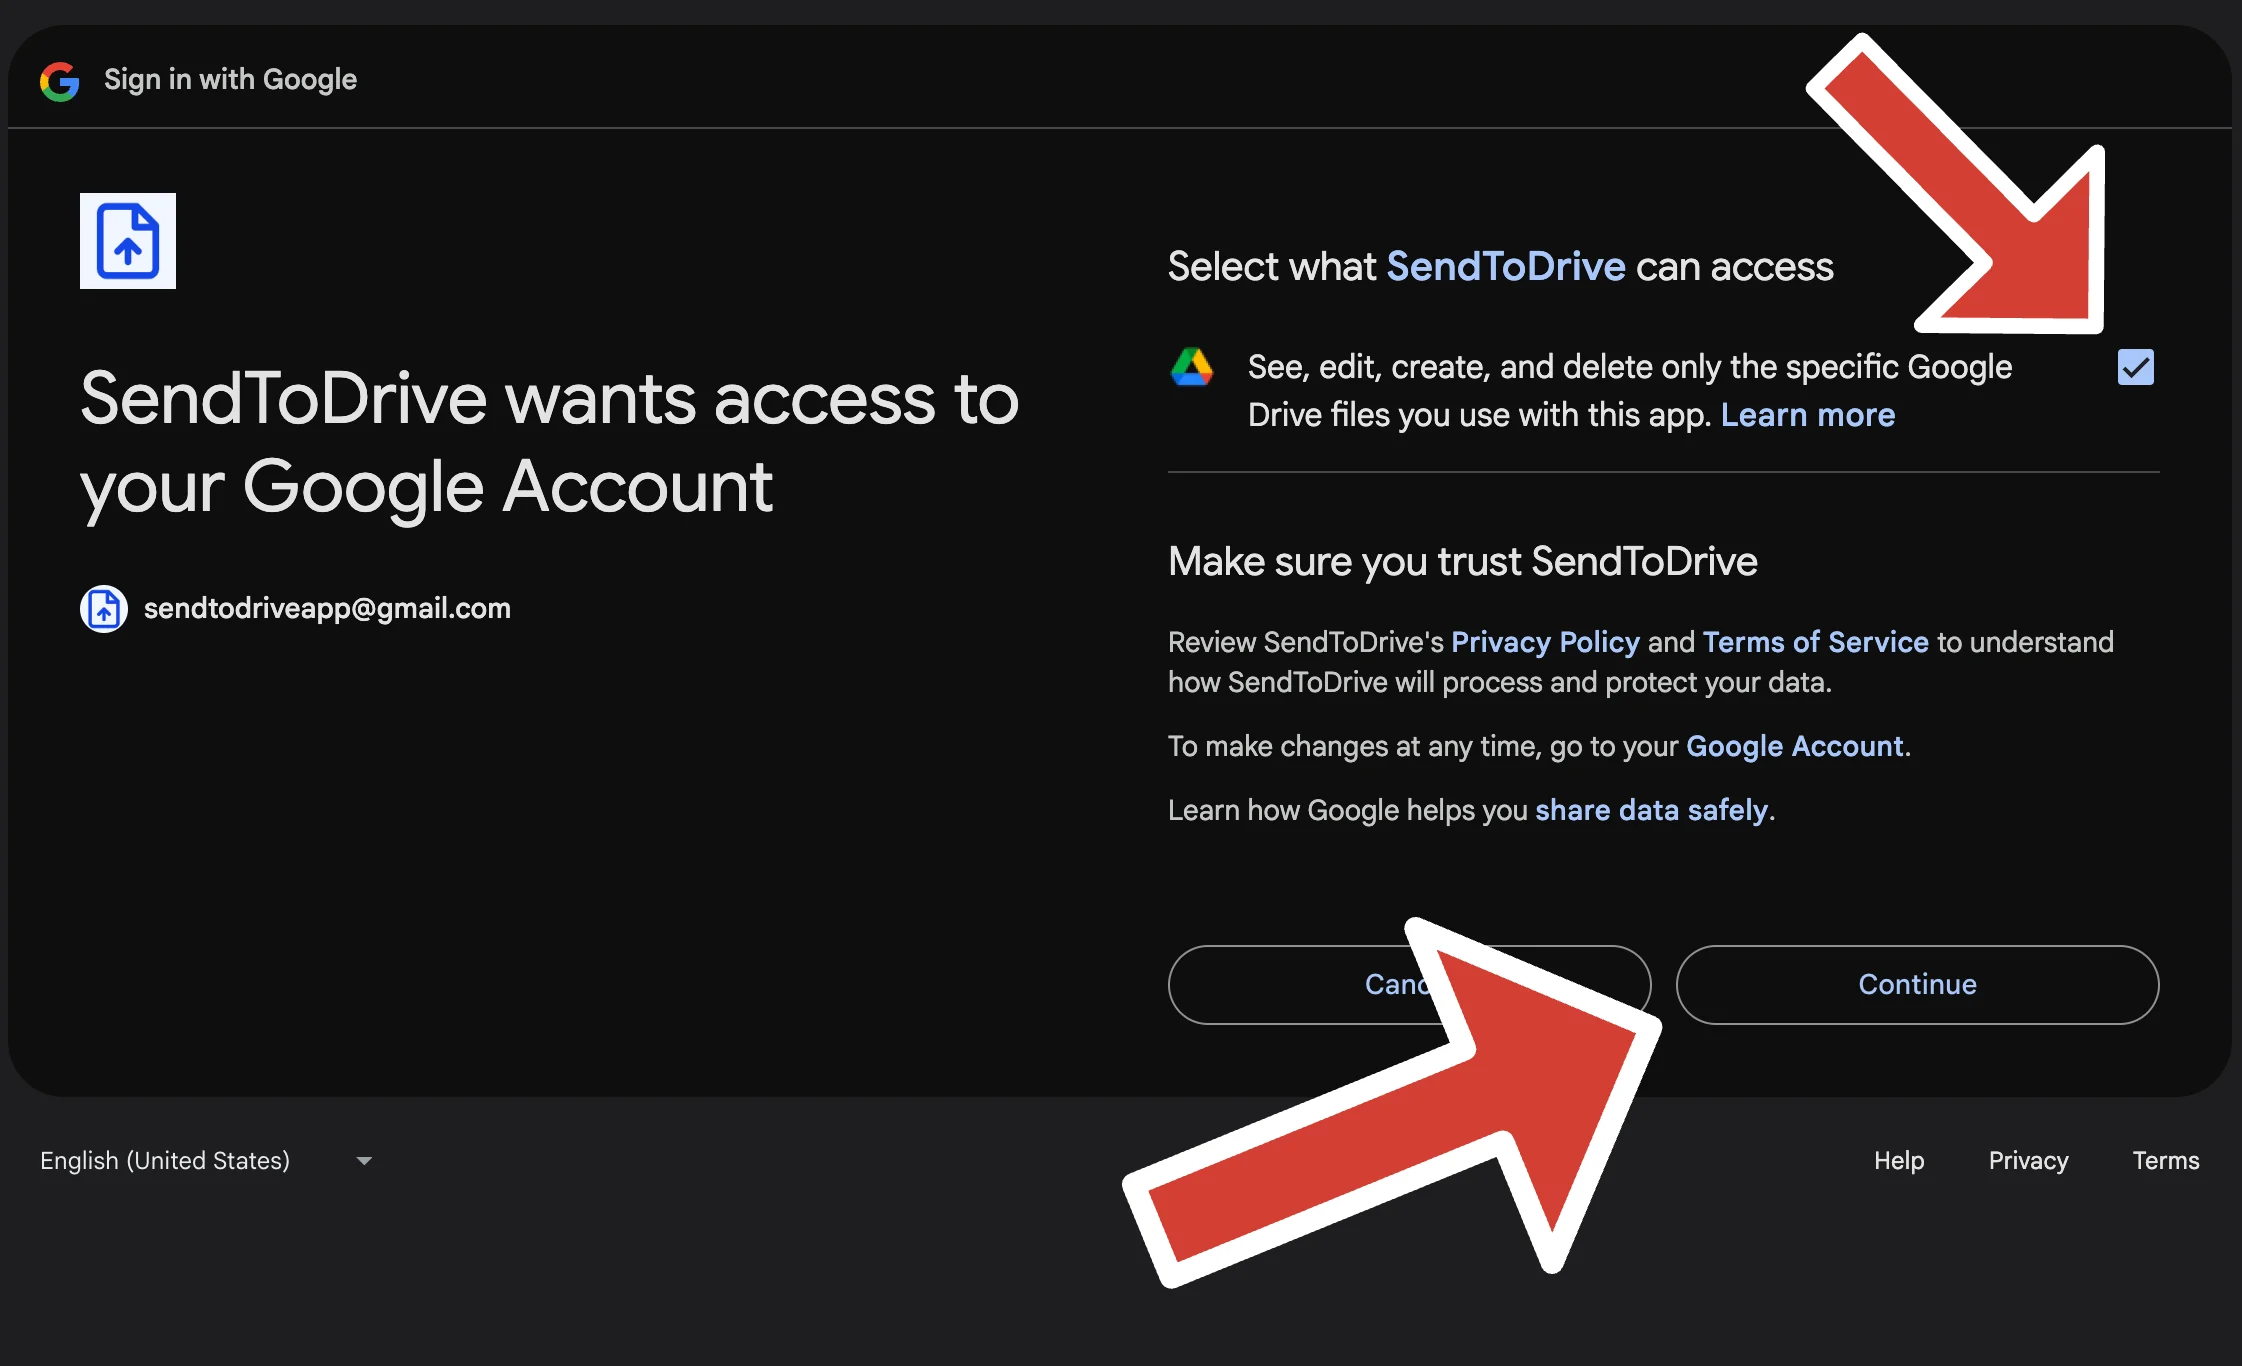
You will see:
SendToDrive wants access to your Google Account
Select the permission:
✔ See, edit, create, and delete only the specific Google Drive files you use with this app
Tick the box and click Continue.
This permission is required so that SendToDrive can upload files directly to your selected Google Drive folder.
Step 6 — Complete Onboarding (First-Time Users Only)
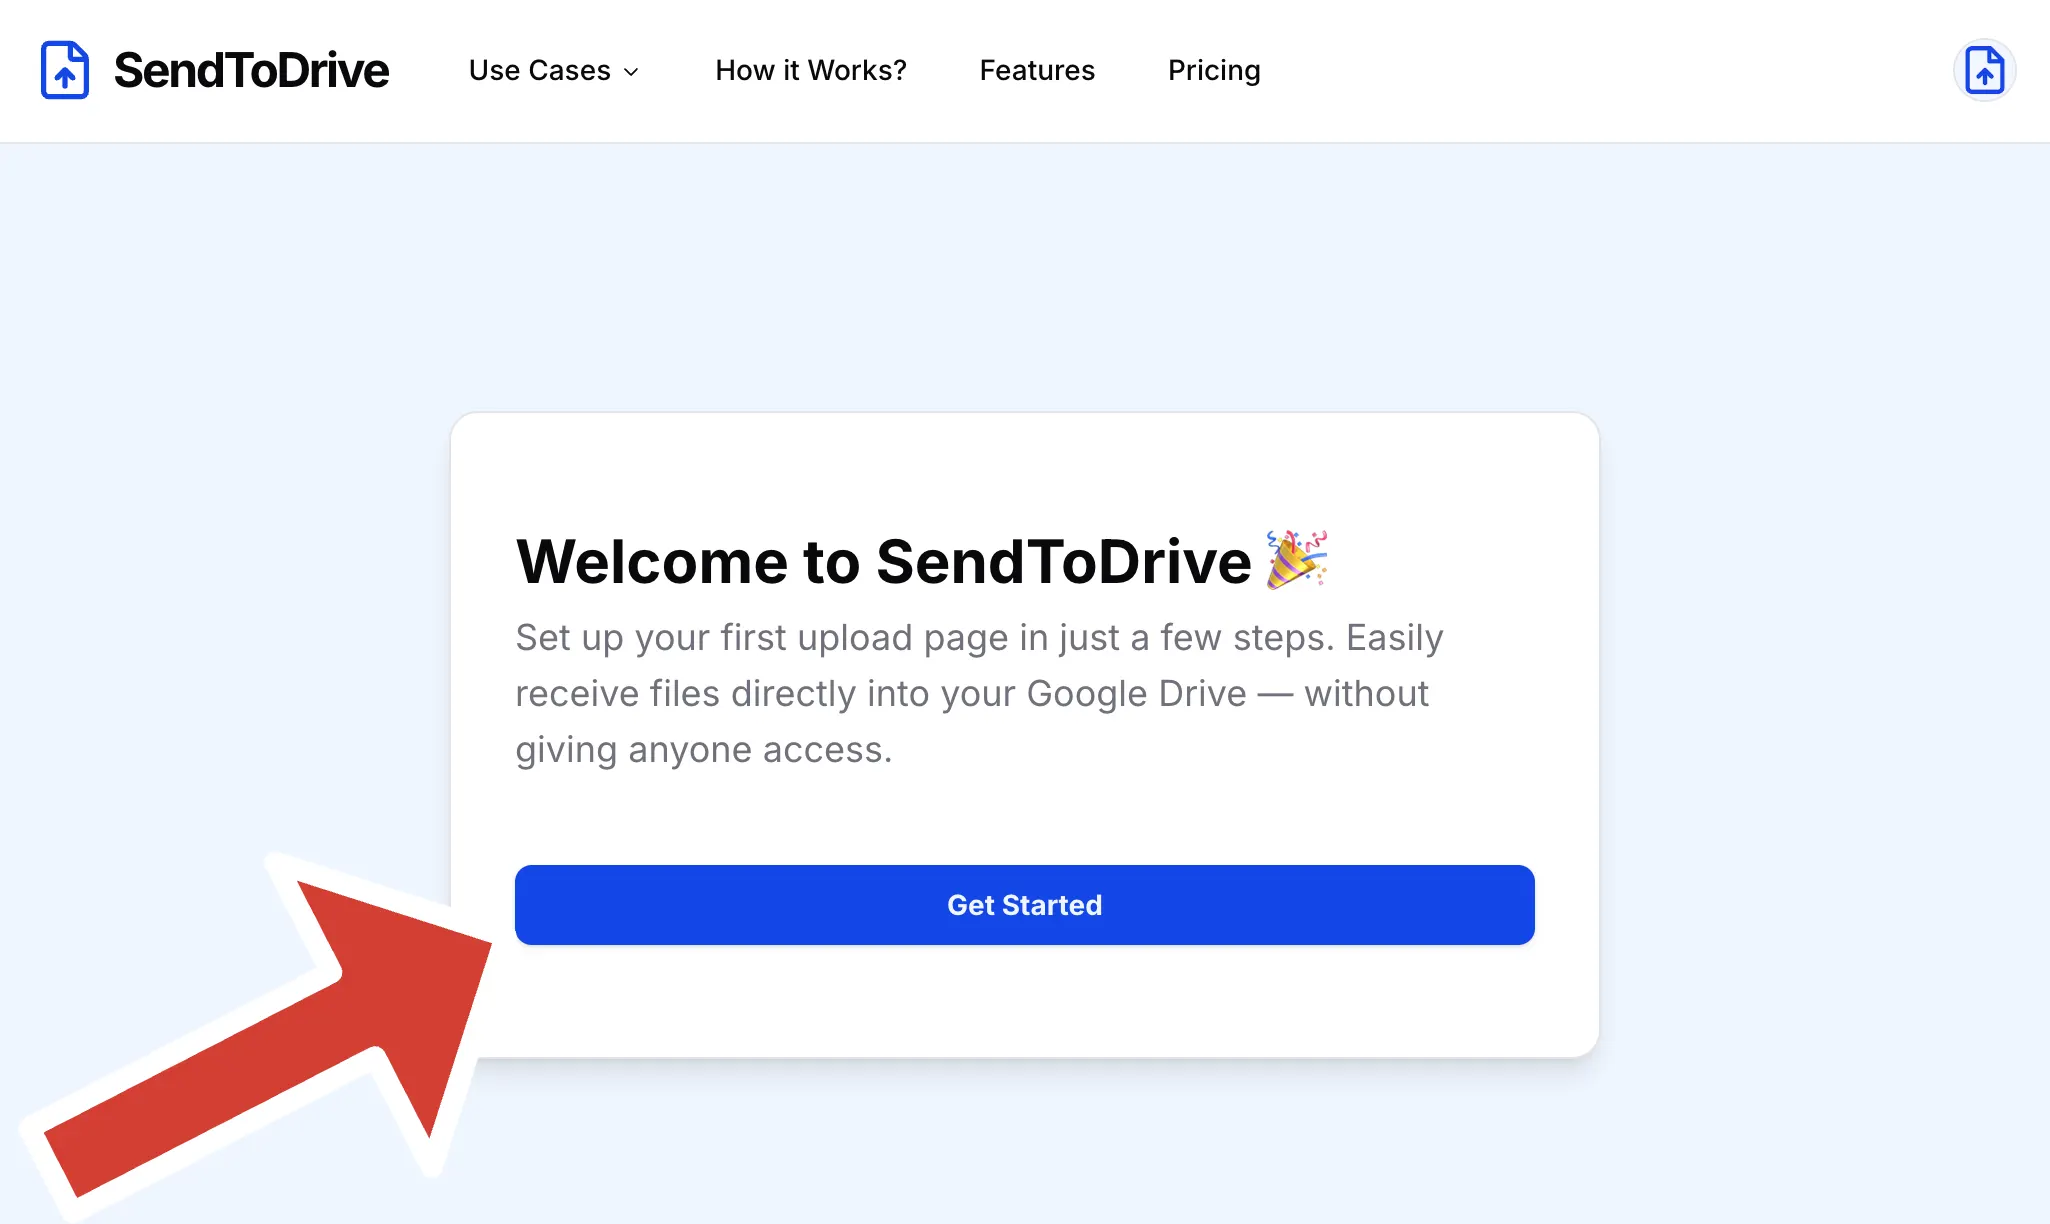
If this is your first time using SendToDrive, you will be redirected to the onboarding page.
In the Welcome section, click:
Get Started
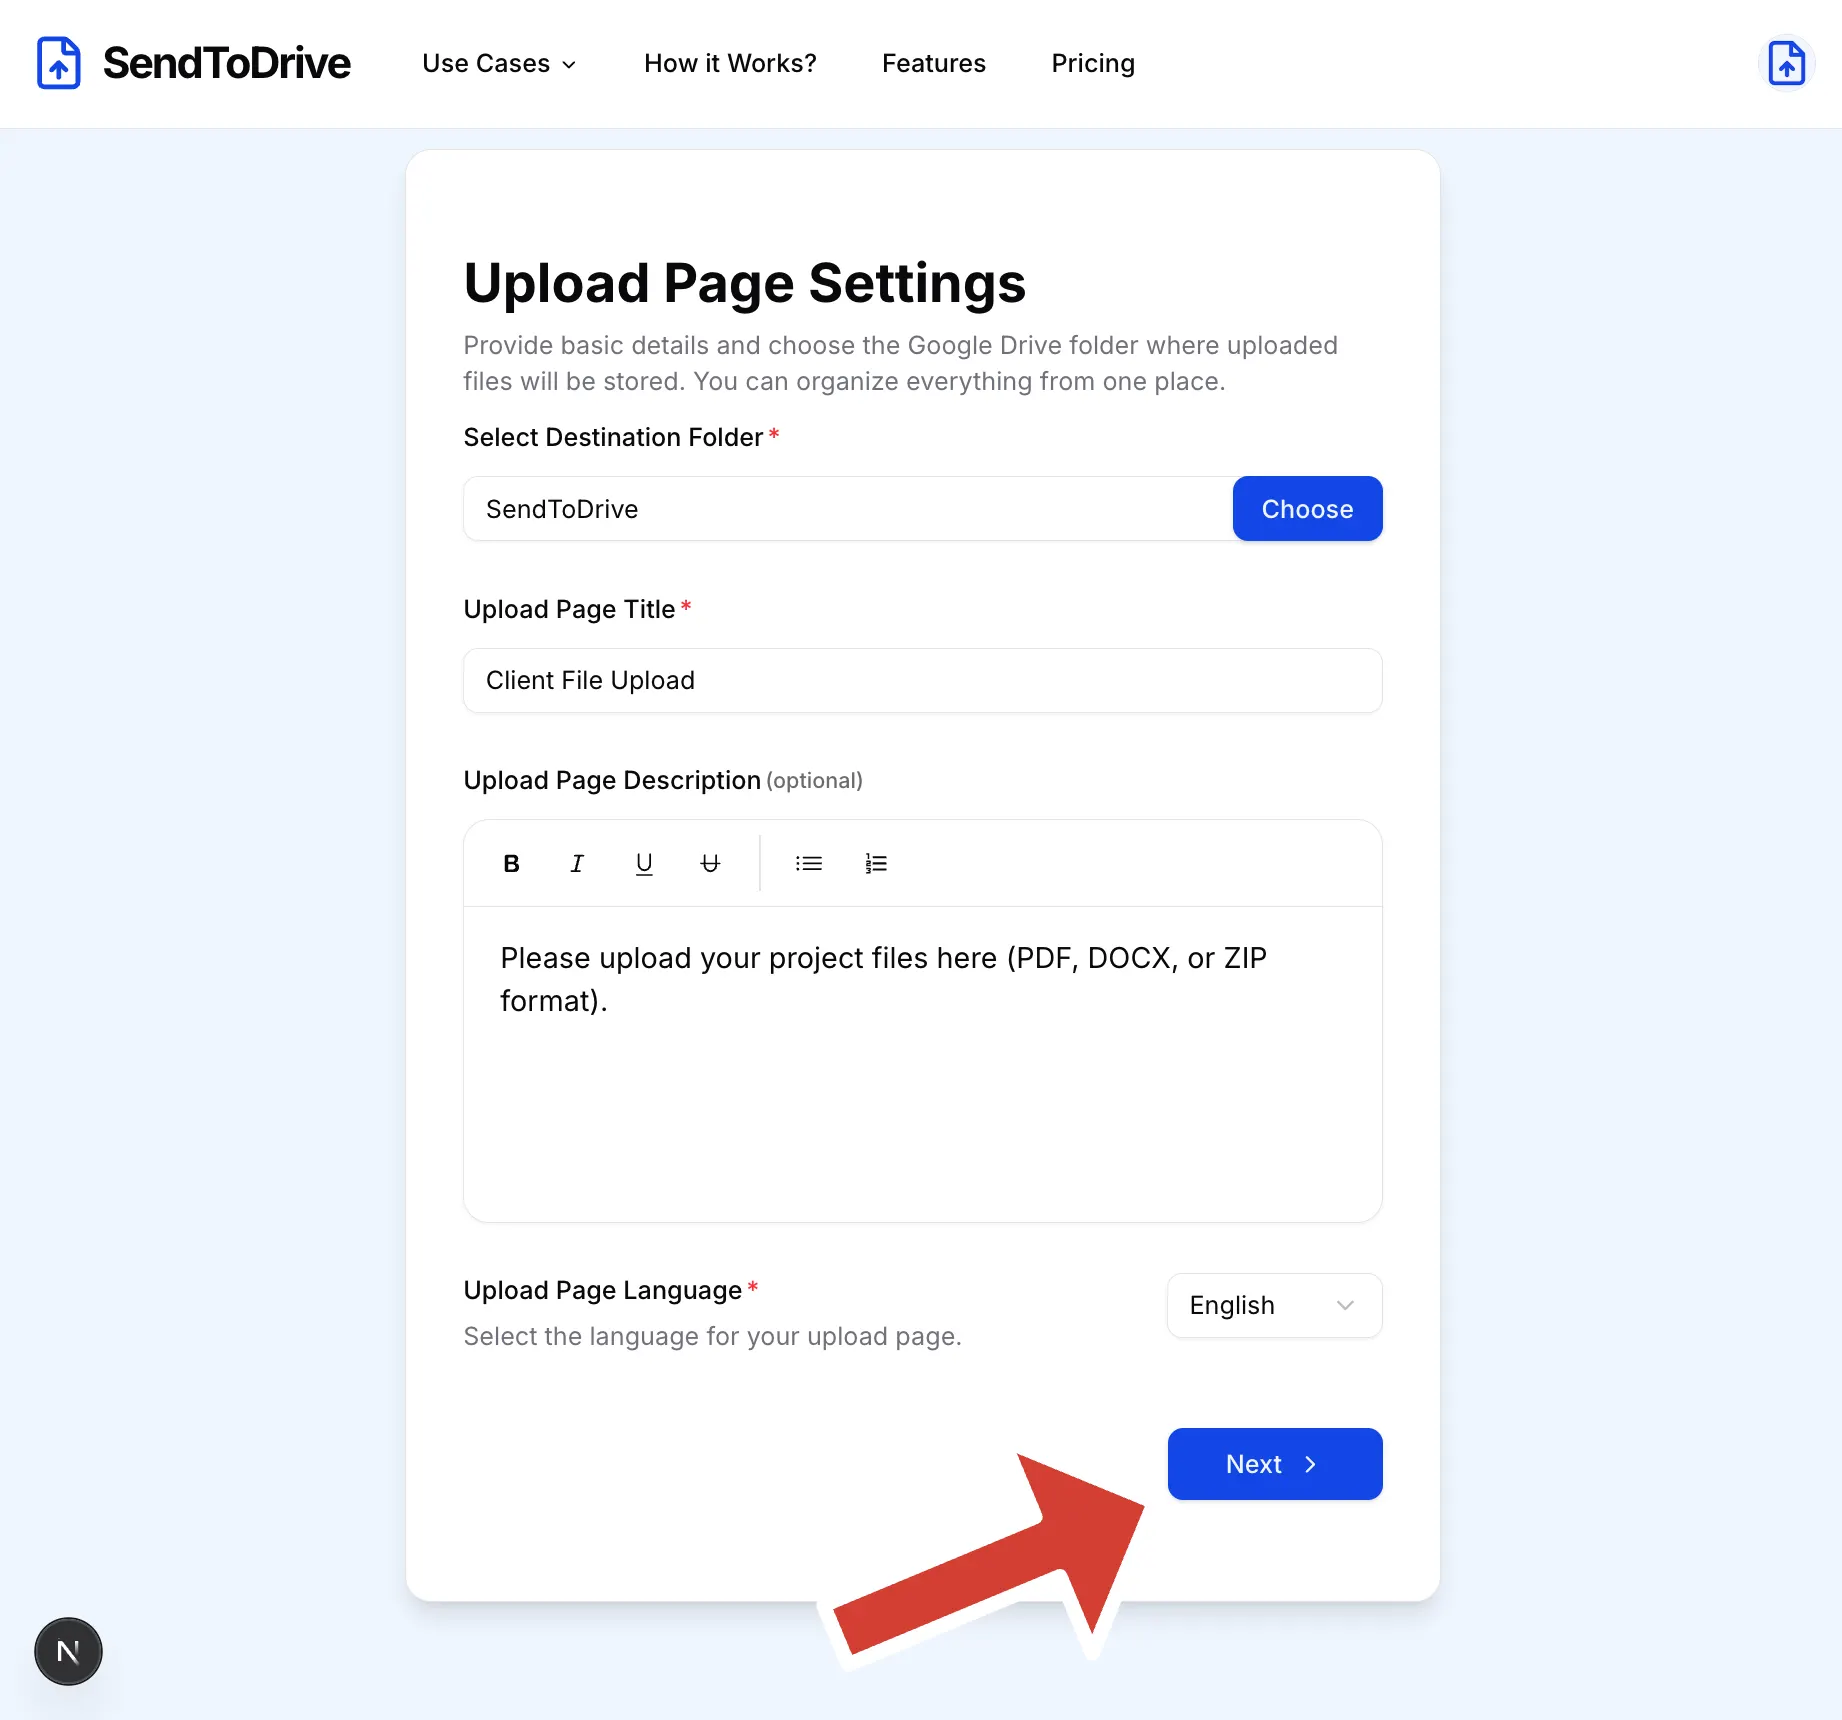
Step 7 — Configure Your Upload Page
-
Click Select Destination Folder and choose where uploaded files will be stored.
If you don’t yet have a folder, create one first in your Google Drive. -
Enter your Upload Page Title (for example: Client File Upload).
-
(Optional) Add a short description explaining what files people should upload.
-
Select your preferred upload page language.
-
Click Next.
Step 8 — Review Your Upload Page
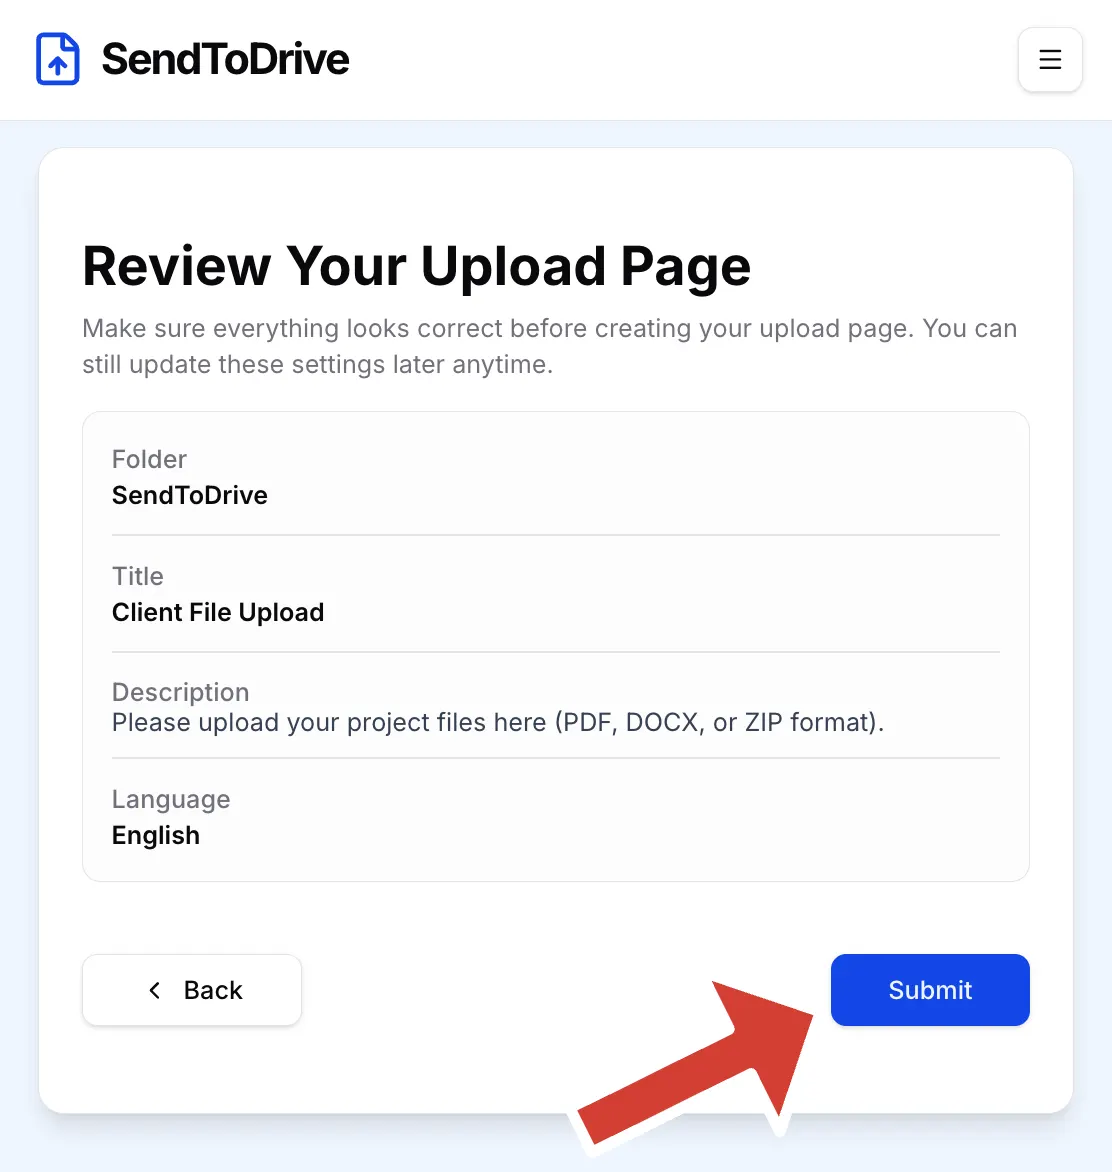
In the Review Your Upload Page section:
Make sure everything looks correct.
Click Submit.
Step 9 — Your Upload Page Is Ready 🎉
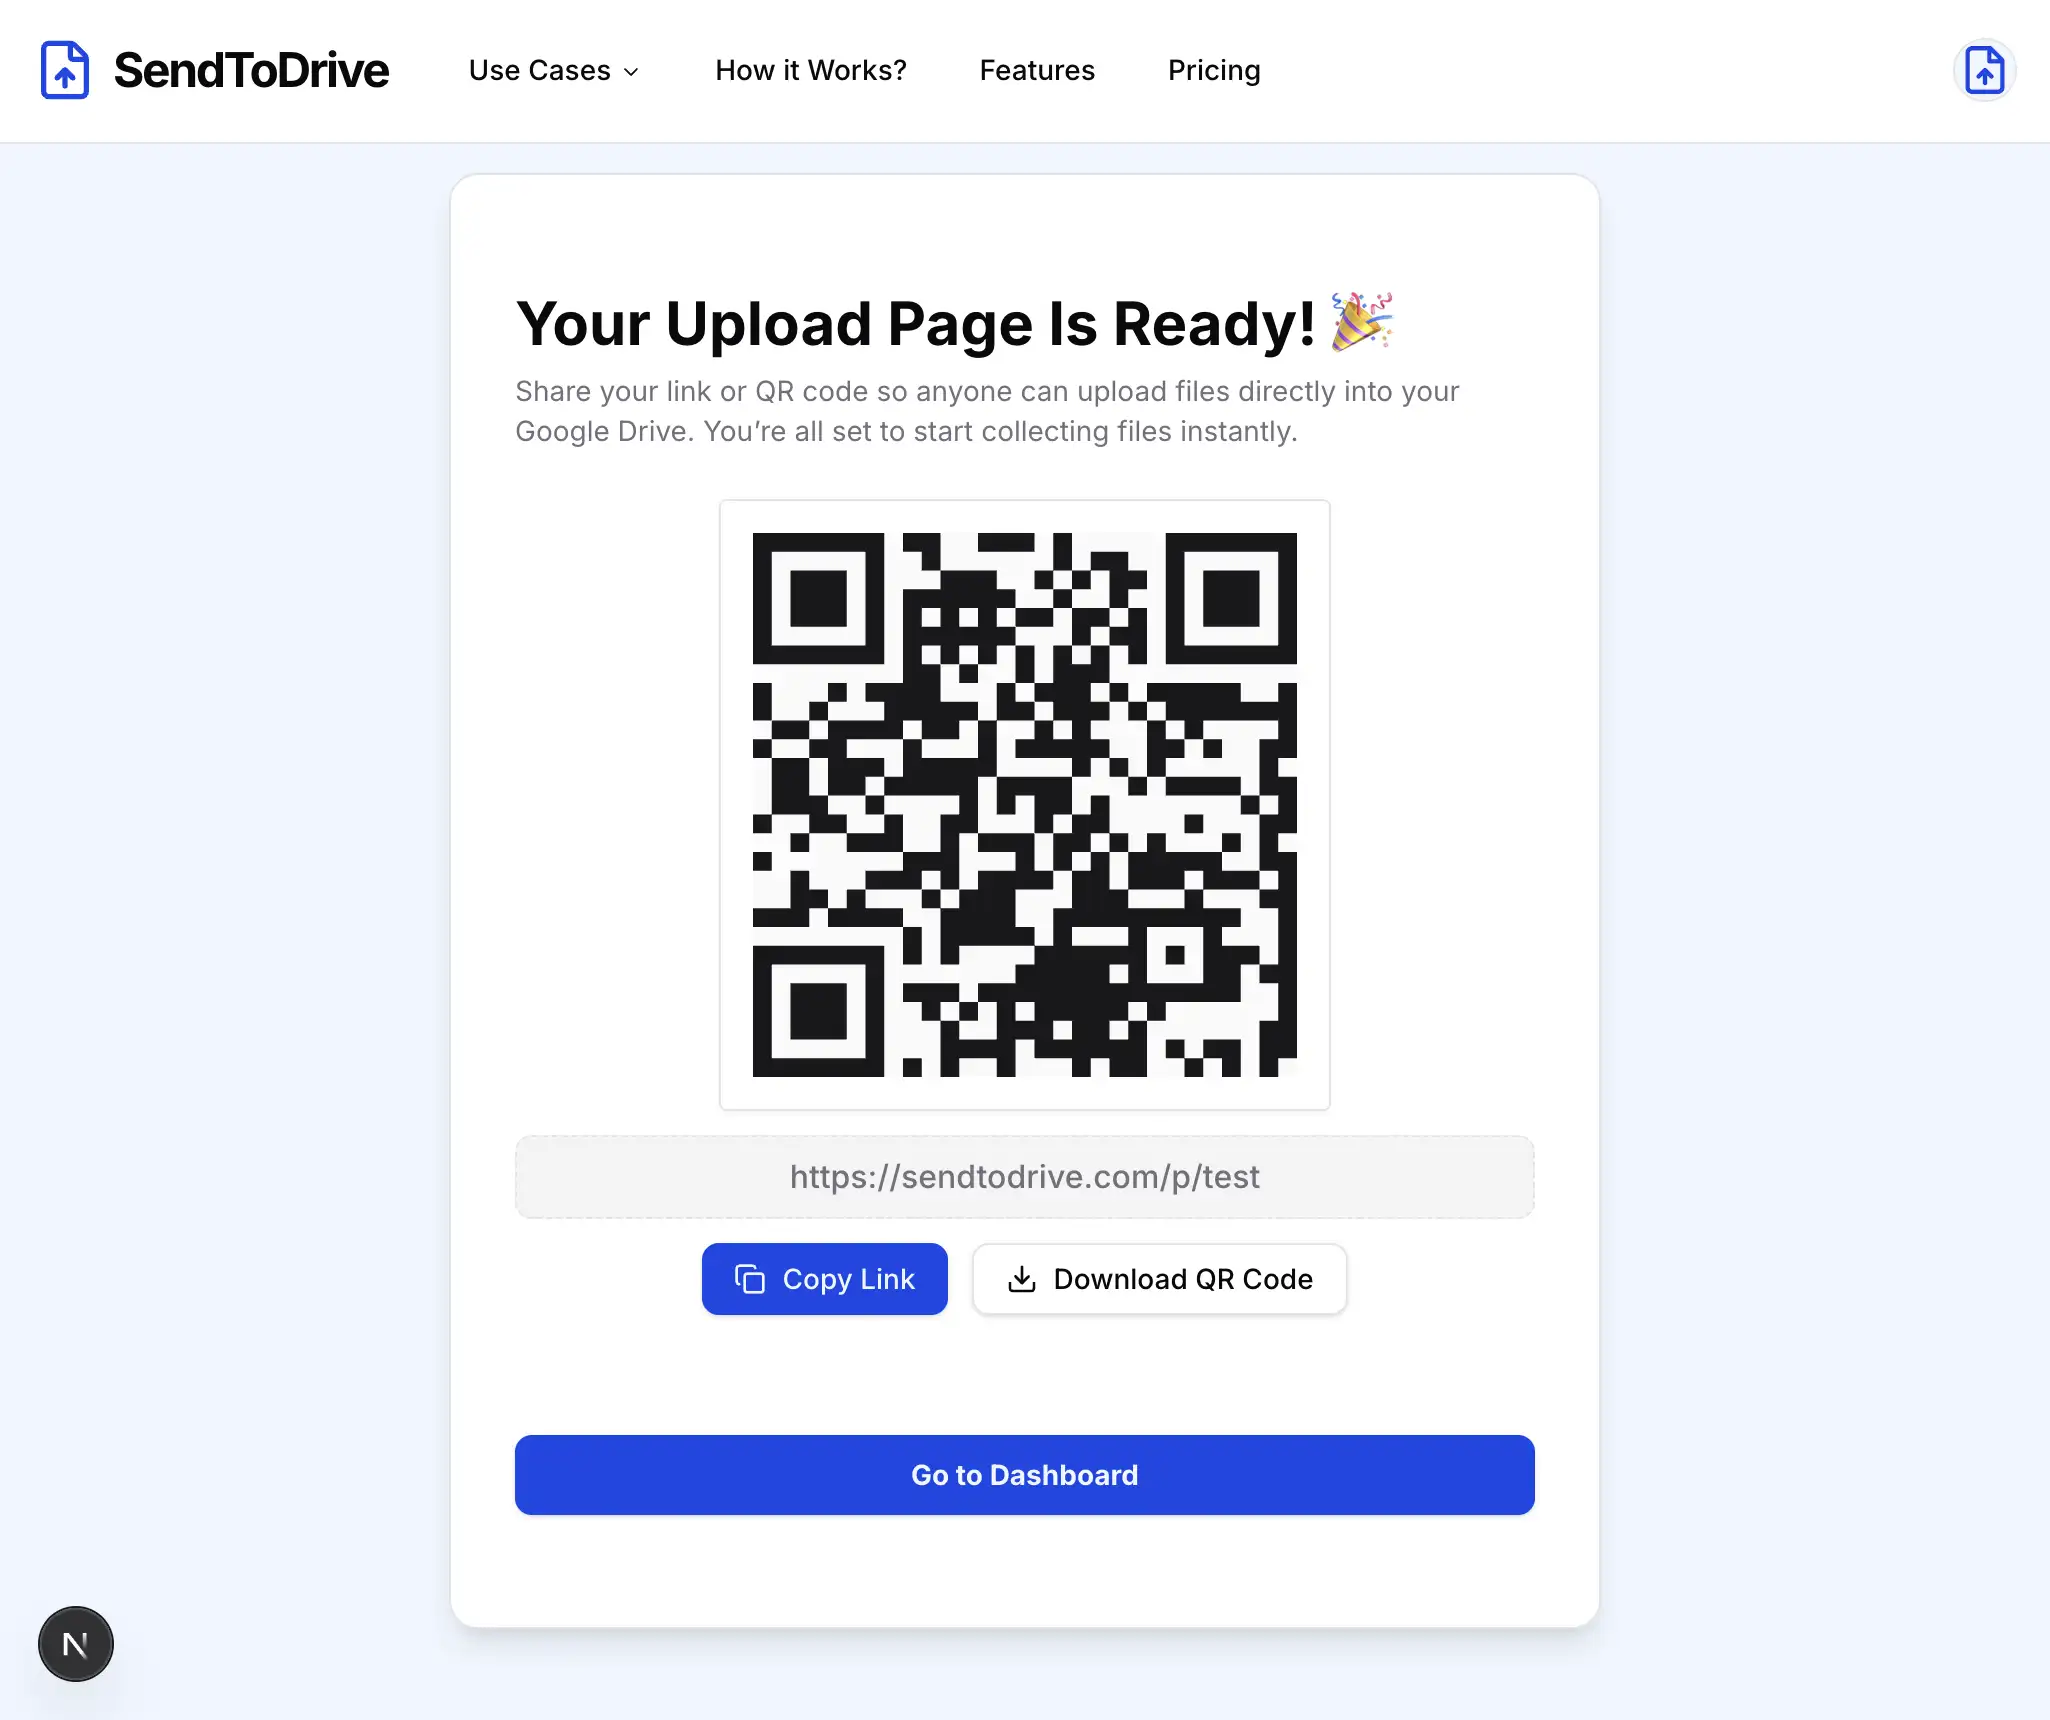
You will see:
Your Upload Page Is Ready!
You can:
- Copy your upload page URL
- Download the QR code
- Click Go to Dashboard
You're All Set 🚀
Your SendToDrive account has been successfully created, and your upload page is ready to use.
You can now start collecting files directly into your Google Drive — securely and without email attachments.